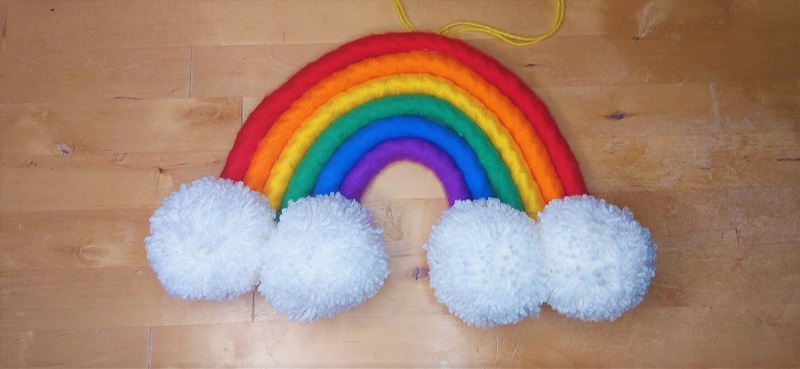
Hanging Rainbow
Hanging Rainbow (No-sew version)
To celebrate Pride Month we are embracing the colours of the pride flag, making a hanging rainbow from rope and wool. In 1994 a rainbow flag stretching a mile-long was paraded for the 25th anniversary of the Stonewall riots. Since then it has been a symbol of peace and solidarity for the LGBTQ+ community, embodying a message of love, acceptance and equality.
The rainbow has also been adopted by many other causes, from the NHS to Autism. It is no surprise that people use the rainbow as their symbol of hope, inspired by this natural occurrence that can only appear after a mixture of rain and sunshine.
Over the years, many worthy variations have been made to the pride flag to include more of the community. Activists have redesigned the flag to highlight issues such as the “Victory over Aids” flag which added a black strip to the bottom. Across the world, countries have adopted their own interpretation of the rainbow flag for their LGBTQ+ communities.
We will be making a hanging rainbow based on the commonly used six-striped version of the pride flag; red, orange, yellow, green, blue and violet. We will be doing the easier, no-sew version. I will tell you where the sewing would be though, for those of you that would prefer to grab the needle and thread.

You will need:
- 12mm rope – approximately 2 metres
- Tape e.g. masking tape or Sellotape
- Floral wire – approximately 3 metres
- Wire cutters
- Wool - Red, orange, yellow, green, blue and violet
- Wool – White for the pompoms
- Scissors
- Glue gun
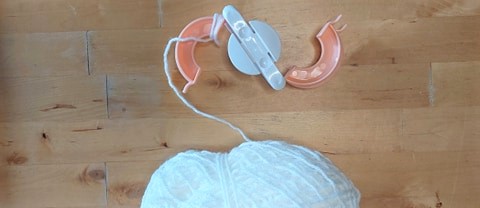
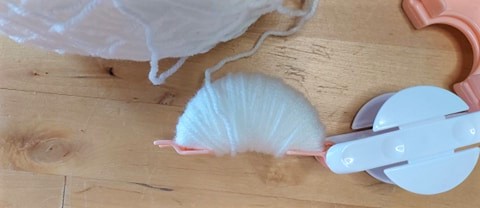
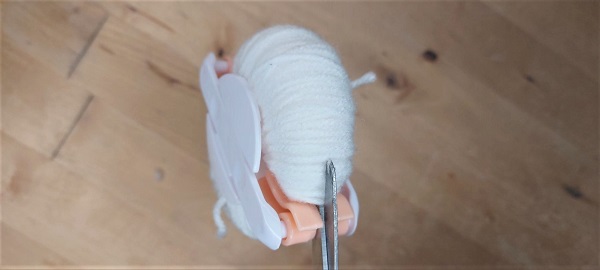
- Pompom maker (optional)
To Make:
1. Cut your rope
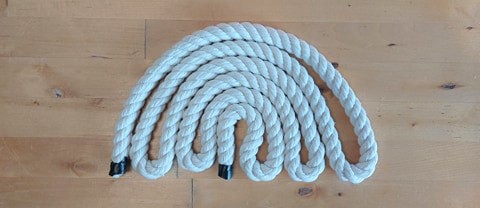
Lay your rope into a rainbow shape with six levels. Cut each strip and wrap tape around the ends to stop them from fraying. These are the sizes of my strands:
Red 430mm
Orange 360mm
Yellow 330mm
Green 280mm
Blue 230mm
Violet 180mm
2. Attach wire
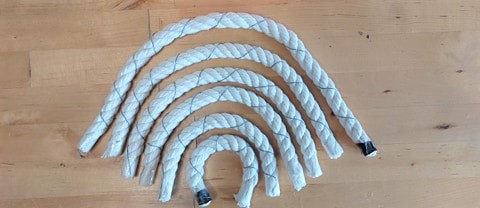
Wrap wire around your rope strands. This will help you to shape your rainbow. Tape the wire at the ends to secure into place.
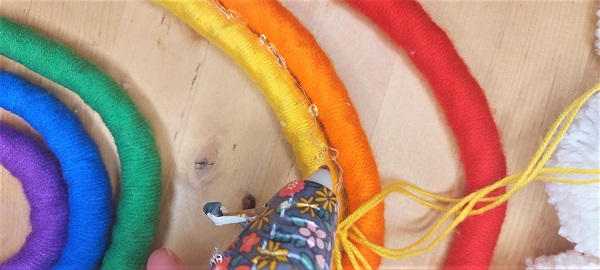
3. Adding the wool
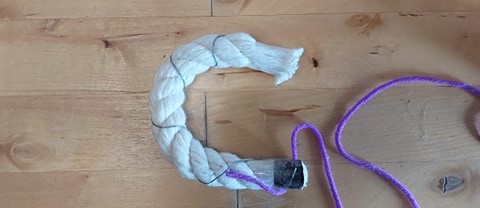
Lay a short tail of wool onto your rope, and then wrap the wool on top. Continue along the rope. Regularly turn the rope to check for gaps in the wool. When you reach the other end, tie a double knot and cut from your ball of wool.
Tuck the remaining strand under your wrapped wool. Top tip: find something pointy to help you push this in such as a needle or a folk.
Repeat this step for all six colours of your rainbow.
4. Attach your hanger
Cut off around 1 meter of yellow wool, double to over and tie into a loop.

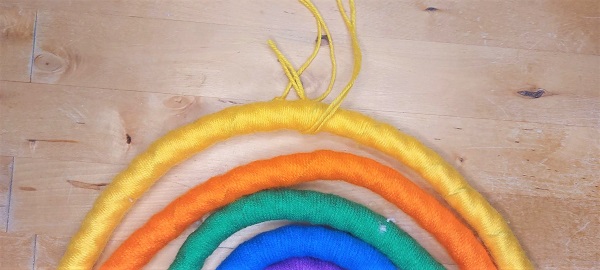
Loop this wool over the yellow section of your rainbow, and lay your rainbow back together. When glueing your rainbow together in the next step, be sure to pull this string so that the string for hanging will blend into the yellow section of the rainbow.
Sewing version: If preferred, you can sew some ribbon tightly onto the back of your rainbow at the end.
5. Connecting your rainbow
Heat up your glue gun. Assemble your rainbow so that it is bent roughly to the shape you would like. Working on the side which you would like to be your back, begin to add glue down the creases of the rainbow. Push gently together while the glue dries.
Sewing version: You can complete this step with an upholstery needle and thread. This often looks neater however you will need plyers, more time and a lot of elbow grease to get the needle through the thick rope.
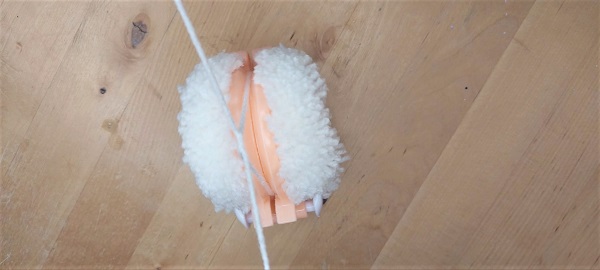
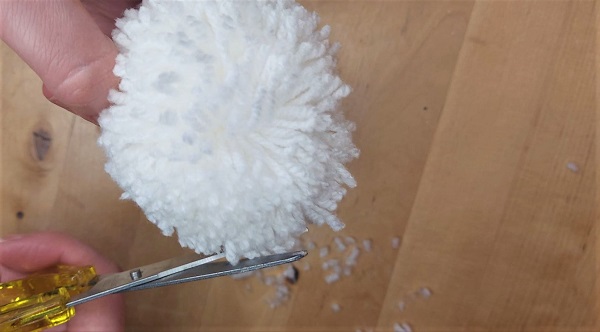
6. Make and attach your pompoms
Using a pompom maker, make 4 large white pompoms. Glue your pompoms to the bottom of your rainbow to create clouds.
Now your rainbow is ready to hang, or gift to someone to spread joy and colour into the world.
Guest blog: This blog has been written by Gemma Pratt, a member of Sotonettes WI. She also owns the family-run company Mayinspire, specialising in teaching craft to adults.