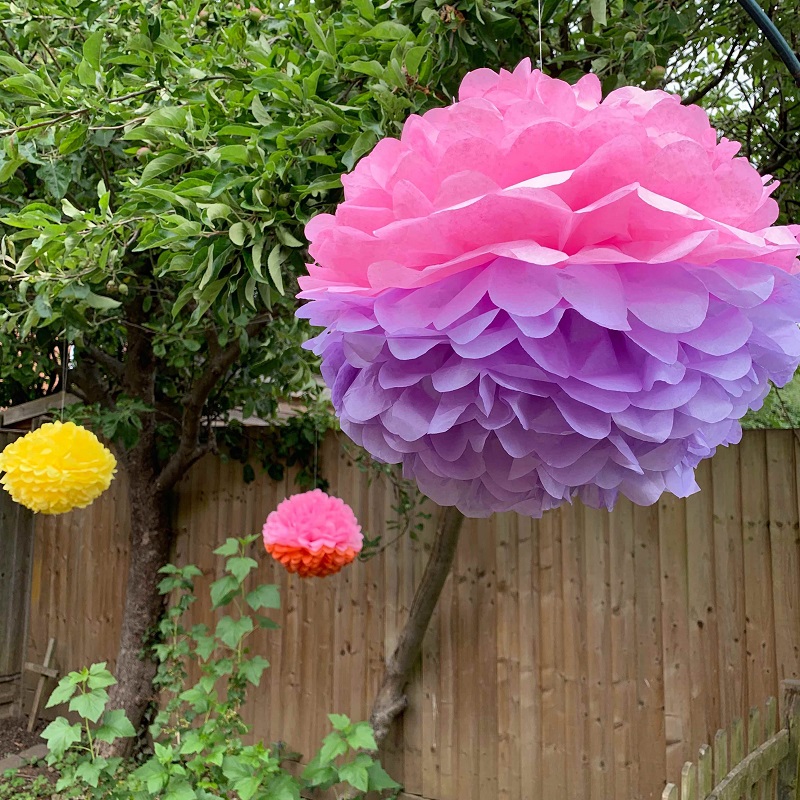
Party Pompoms
Skill level: Beginner
Size: Approximately 34cm diameter
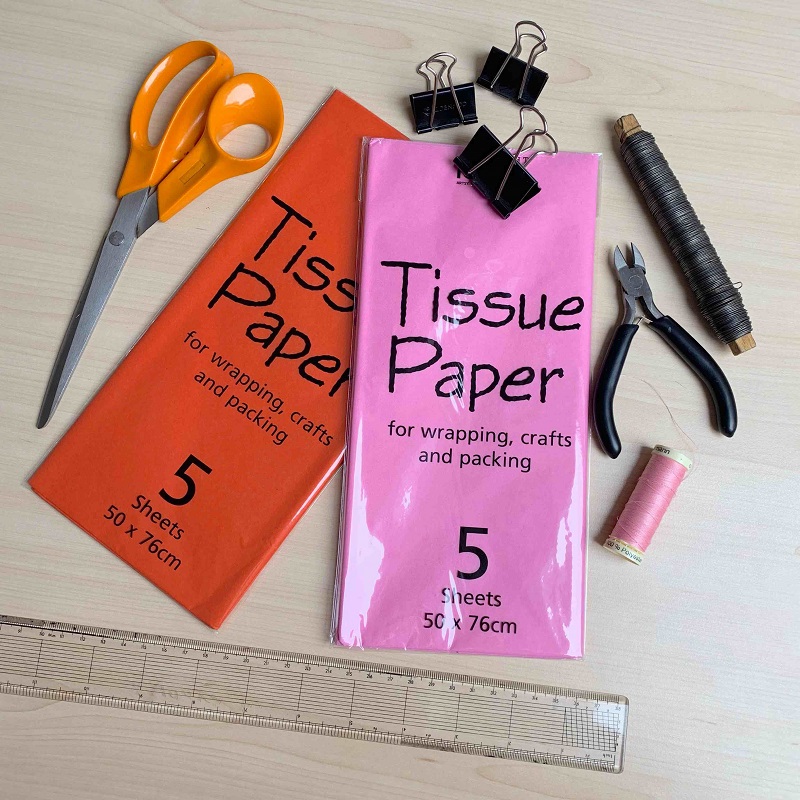
You will need:
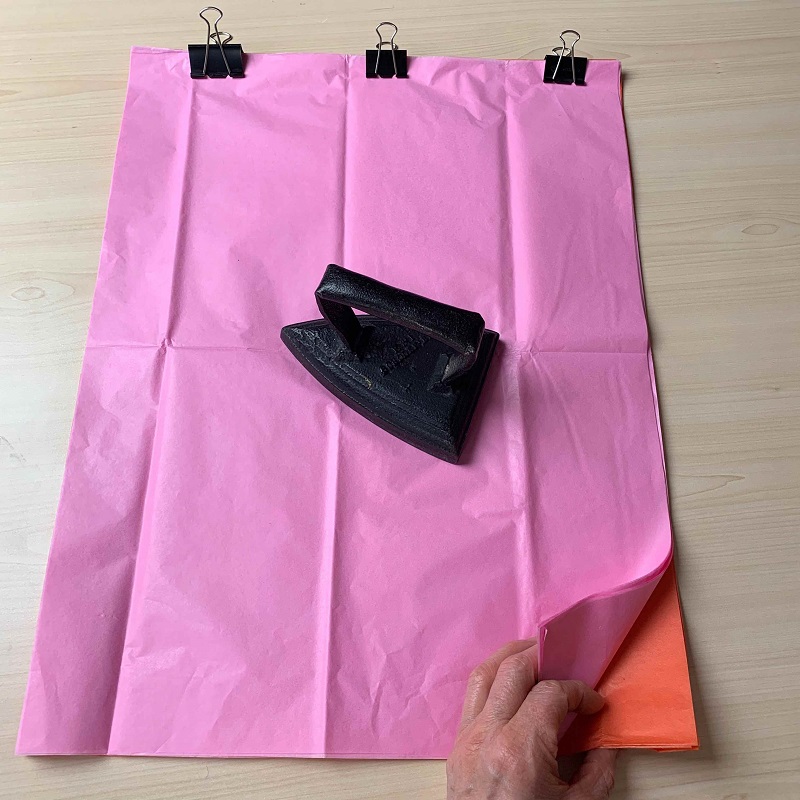
- 10 sheets of tissue paper 50 x 76cm – you can either choose just one colour or use two contrasting shades, as shown here
- Fold-back clips, grip clips or large paper clips
- Paperweight
- Paper scissors
- Pen
- Ruler or tape measure
- 4cm diameter lid – from toiletries bottle or similar circular object
- Fine jewellery wire
- Jewellery pliers or small snips
- Matching sewing thread
To make:
1. If folded, open out your tissue paper sheets and smooth out creases. Stack all 10 sheets on top of each other keeping all edges level. Fold the stack of sheets in half, bringing the shorter edges together and firmly crease along the folded edge.
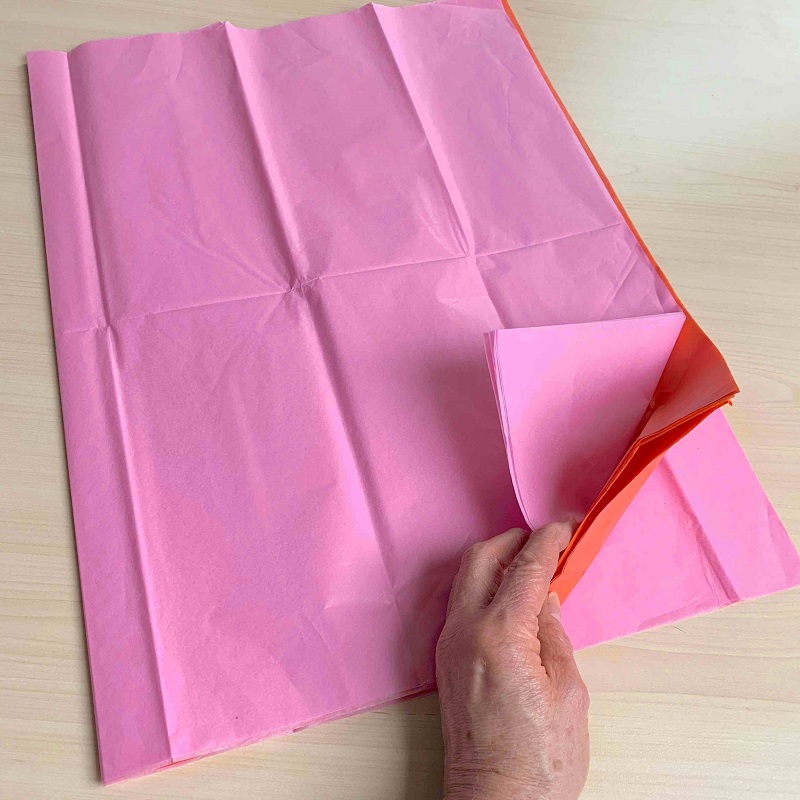
2. Open the sheets back out flat. Using scissors, cut along the new creased line through all layers of paper, to create two smaller stacks of 10 sheets.
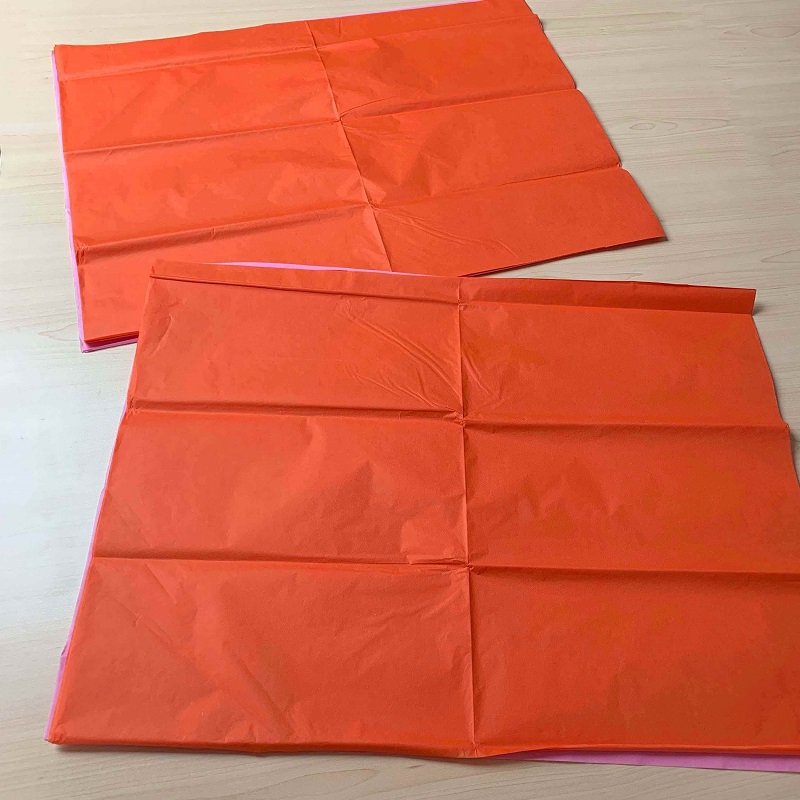
3. Stack the two sets of tissue on top of each other, keeping all edges level and using the clips along one shorter side to stop the sheets from slipping.
4. Weight down the centre of the tissue paper and, at the opposite short end to the clips, take all layers of tissue and fold over a 4cm section evenly across the whole width; crease fold firmly.
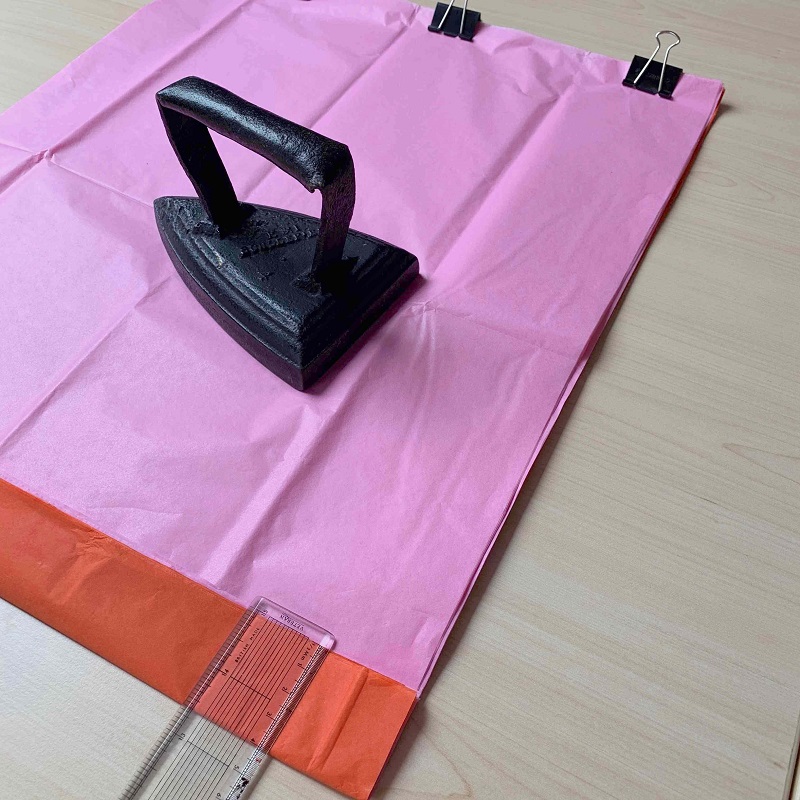
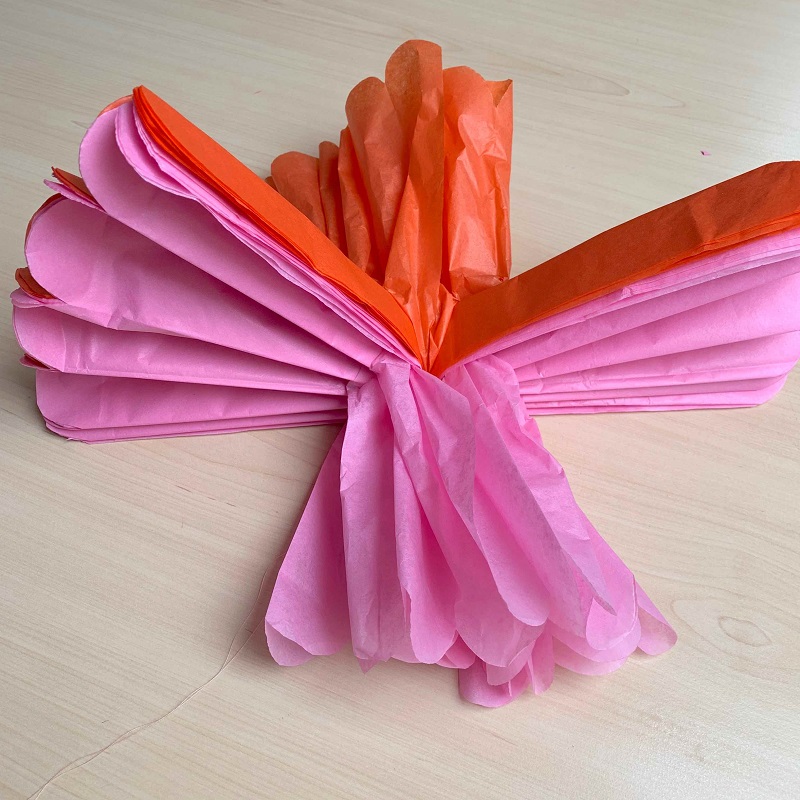
5. Remove the weight and carefully turn the papers over, ensuring nothing slips. Replace the weight and make a second fold 4cm deep. Continue pleating the paper in a concertina fashion until you get to the opposite side and remove the clips.
Note: It is important to make sure that your measuring and folding is accurate, to ensure a nicely shaped pompom at the end.
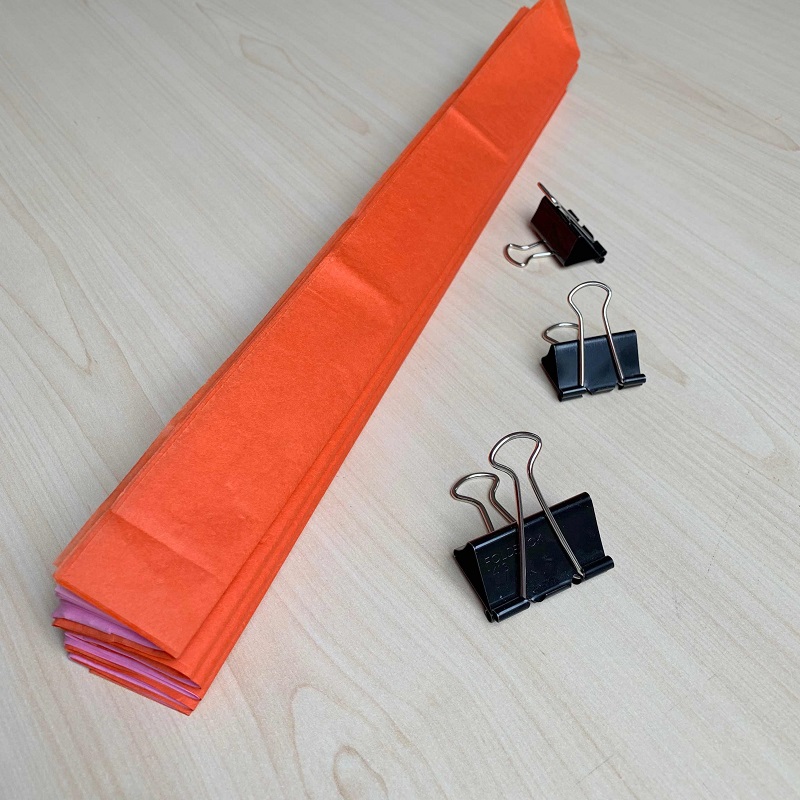
6. Now open up the pleated papers and carefully split the stack into four sets of five sheets. Refold each set of five to create four separate pleated stacks. You are separating the tissue layers at this stage to reduce the thickness and make it easier to shape the ends in the next step.
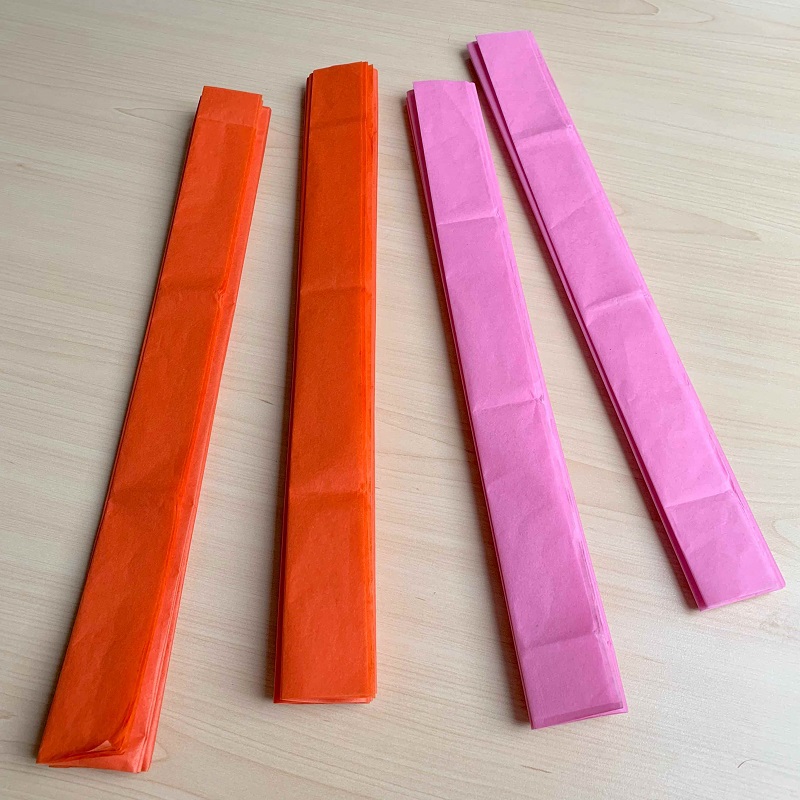
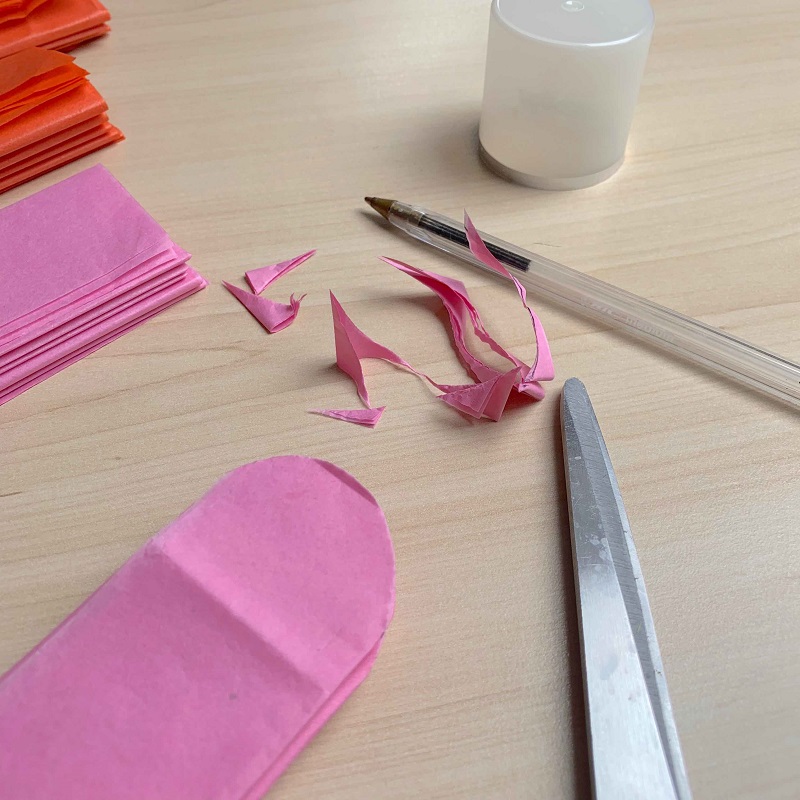
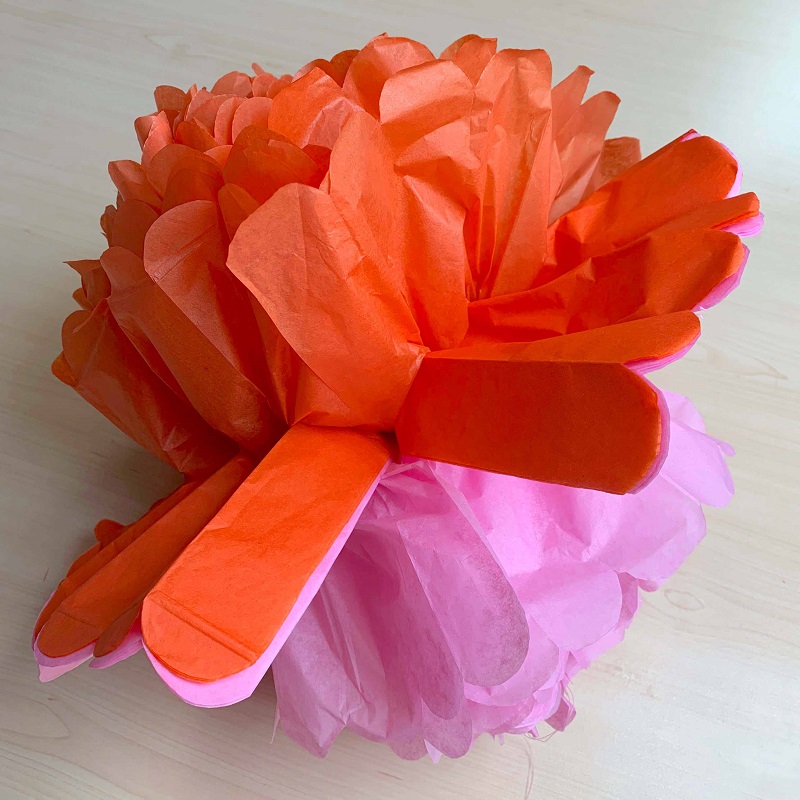
7. Using a container lid or other circular object, draw a curve at the end of one pleated stack of paper. Using scissors shape the end by trimming away the excess paper. Repeat this process, at the opposite end and, on the remaining three pleated stacks of paper.
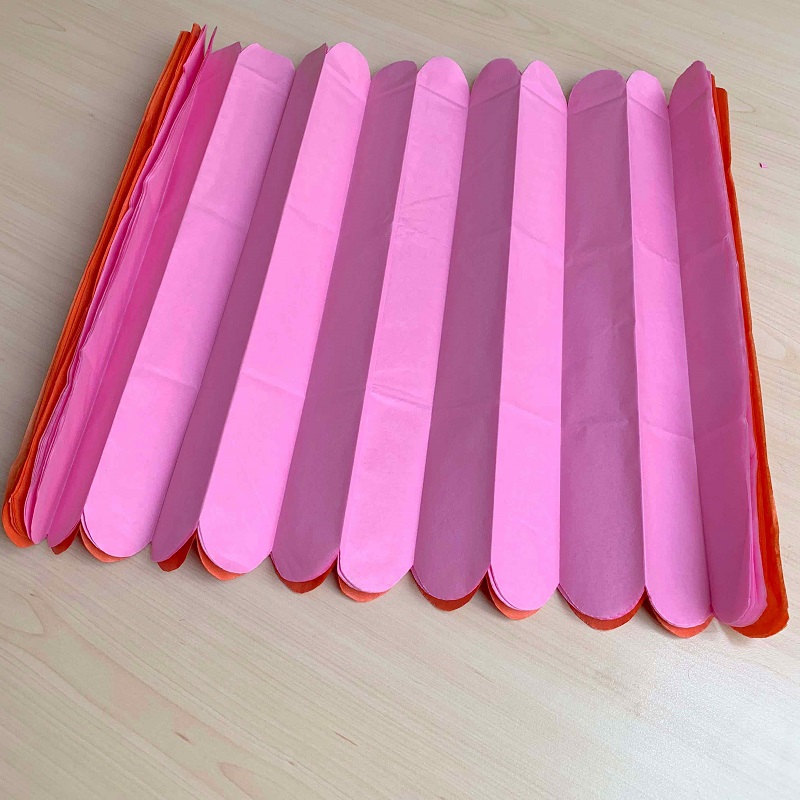
8. Unfold each stack of paper and lay them back on top of each other again, making sure all the folds line up and all edges level.
Note: If using two colours you can create a stripy pompom, by alternating the five sheets of each colour, or for a half and half pompom, then stack 10 of one colour with 10 of the second colour on top.
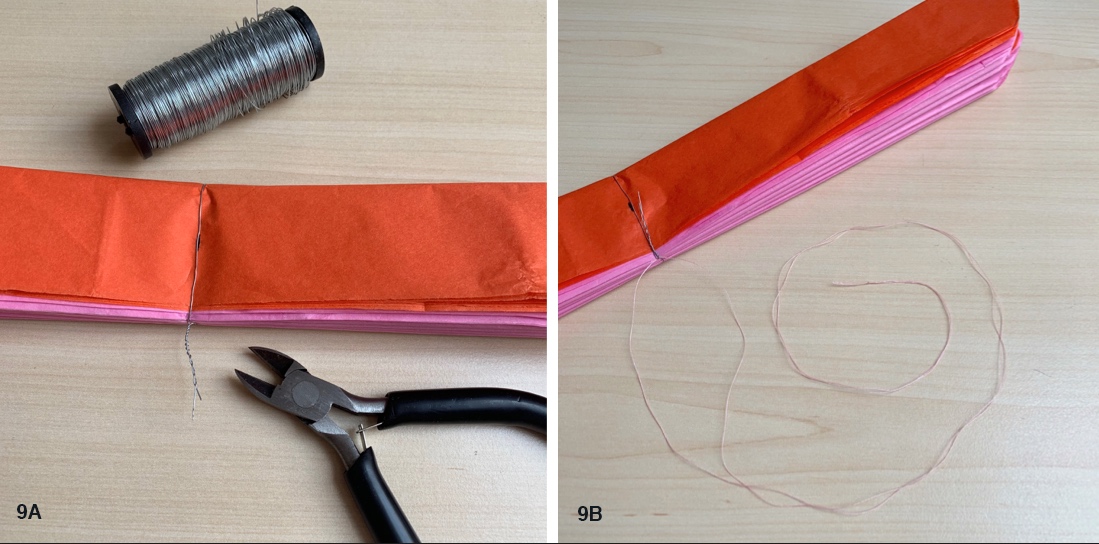
9. Refold all the sheets together, then measure and mark the centre with a pen. Take a length of fine wire and wrap it around the centre, twisting the ends together to secure (a); fold the wire ends back to neaten. Take a long length of thread and pass one end under the wire, knot ends together to form a long hanging loop (b).
10. The next part requires patience gently tease away the top sheet of the tissue on one side, taking care not to tear the paper (a). Working still with the same sheet, but on the opposite side of the central wire, tease away the top sheet of tissue and gently bunch them both together to form a nice tight centre (b).
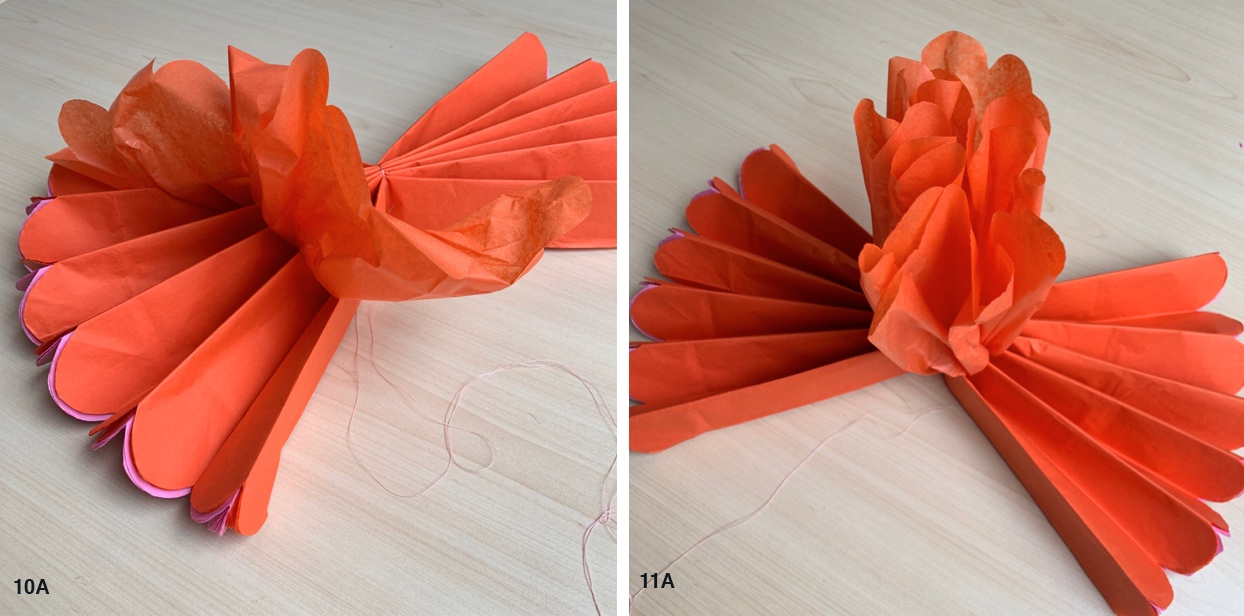
11. Flip the pompom over and repeat step 10 with the top sheet of tissue on the opposite side, taking care to keep the hanging loop-free.
12. Continue teasing out the tissue layers one at a time, rotating the ball and as you go and swapping from one side to the other between layers, to help keep a nice rounded shape. Try to overlap the petals at the sides, so that you don’t end up with any gaps when you have finished.
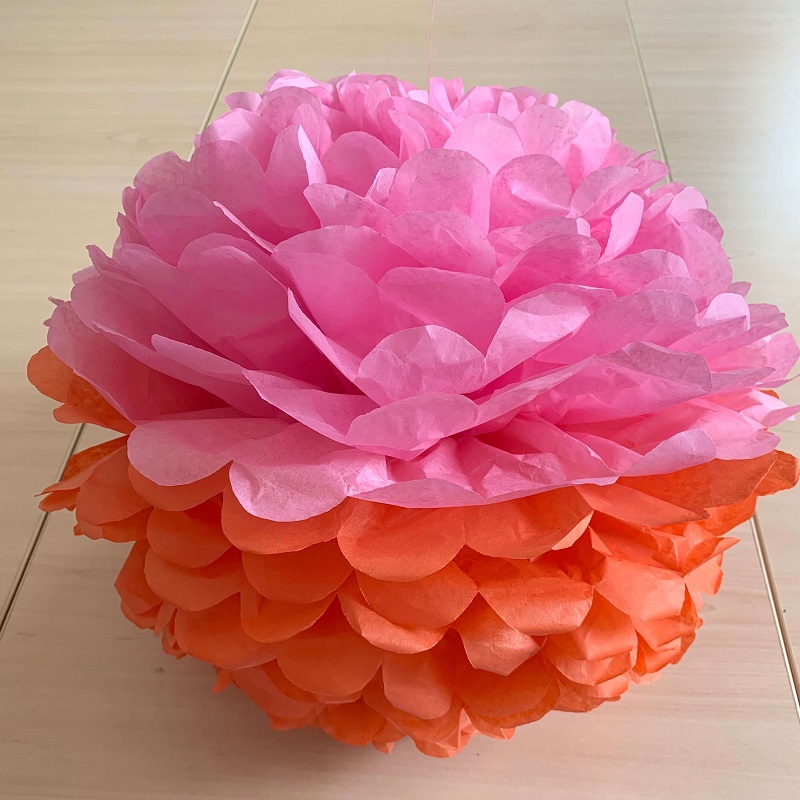
13. Finally, when you get to the remaining two tissue layers, simply separate them slightly, as you don’t want a big gap between them, then gently puff the layers into shape using your fingertips. Your Pompom is now ready to hang.
Project by Jane Bolsover, Craft Consultant, NFWI